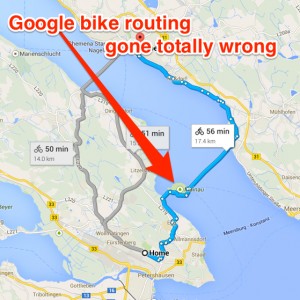
Google knows a lot, but Googles doesn’t know cycling.
Neither their routing algorithm for bikes does any good, nor does Street View offer much more than a car centric perspective to Google’s Earth.
But guess what, as much as Google cannot compete with Wikipedia, so much there is no better alternative for cycling (and walking) than the crowed sourced public domain approach.
In other words: in the very same way that Wikipedia will be and remains the best encyclopedia, the advantage of Openstreetmap’s data compared to Google Maps‘ data will be increasing more and more.
Google’s advantage are just those things that can be beaten with tons of money: Like huge server farms, satellites doing photos and those expensive street view cars.
Cars. And not bikes.
But as technology grows, we all might still not own private satellites. But we do have toy drones. And we do have smart phones.
This is where Mapillary comes into game. A Swedish startup that crowd sources street view photos to anybody who wants to make use of their simple and great app.
It automatically takes (lots of) photos while you are walking, riding or driving anywhere, and afterwards it uploads it (with wifi) to their servers, where it is turned into street view within seconds.
So, download their app, walk a few meters, upload the result, and you will see it immediately. That’s cool.
In fact, that’s more than cool. Especially since this whole project is still in its very early stage. It reminds me of the gold rush period of Openstreetmap, when you could still be the first expert of your own block or village. I remember the fun in 2008, when Helge and I were actually the first ones to map a specific capital.
So Mapillary kind of hits that German gene of a collector, and I am sure the famous sentence of Steve Coast, the founder of Openstreetmap, kind of applies here, too: „Google has all the money, but Openstreetmap has got the Germans“.
I am a professional in cycle tourism, founder of Bikemap, Radweg-Reisen, Cyclesummit, Islandhopping and a frequent international speaker about cycle tourism. And from this perspective I feel the lack of street view for bike paths (if you are not from Europe: here we have tons of dedicated roads for cyclists, many of them – in fact, it is more than 18.000 – do have touristic names and are very popular among cyclists).
But I am also an everyday cyclist. And even from that perspective every other while I want to have a sneak view onto such a bike path.
In other words: there is a need for street view of bike paths. And if there is a need for something, a solution is always around the corner.
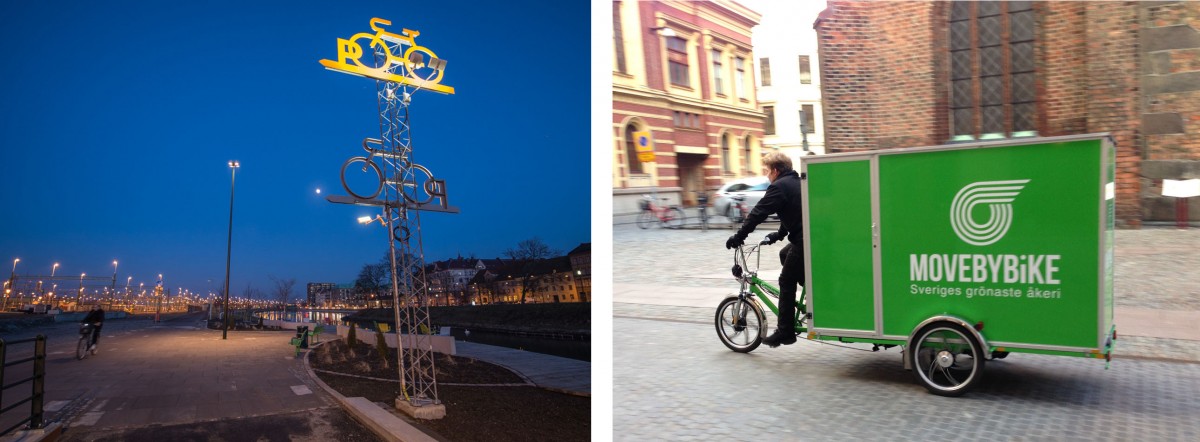
In this case the corner is in Malmö, a nice Swedish town with lots of great cafés, the biggest sign for a bike parking I have ever seen, and even a service that helps you move all your furniture by bike.
Well, and it is Mapillary that is no longer hiding „bakom hörnet“, but out in public now and collecting thousands of street view photos per day. In fact, I bet it will be millions of photos per day, soon.
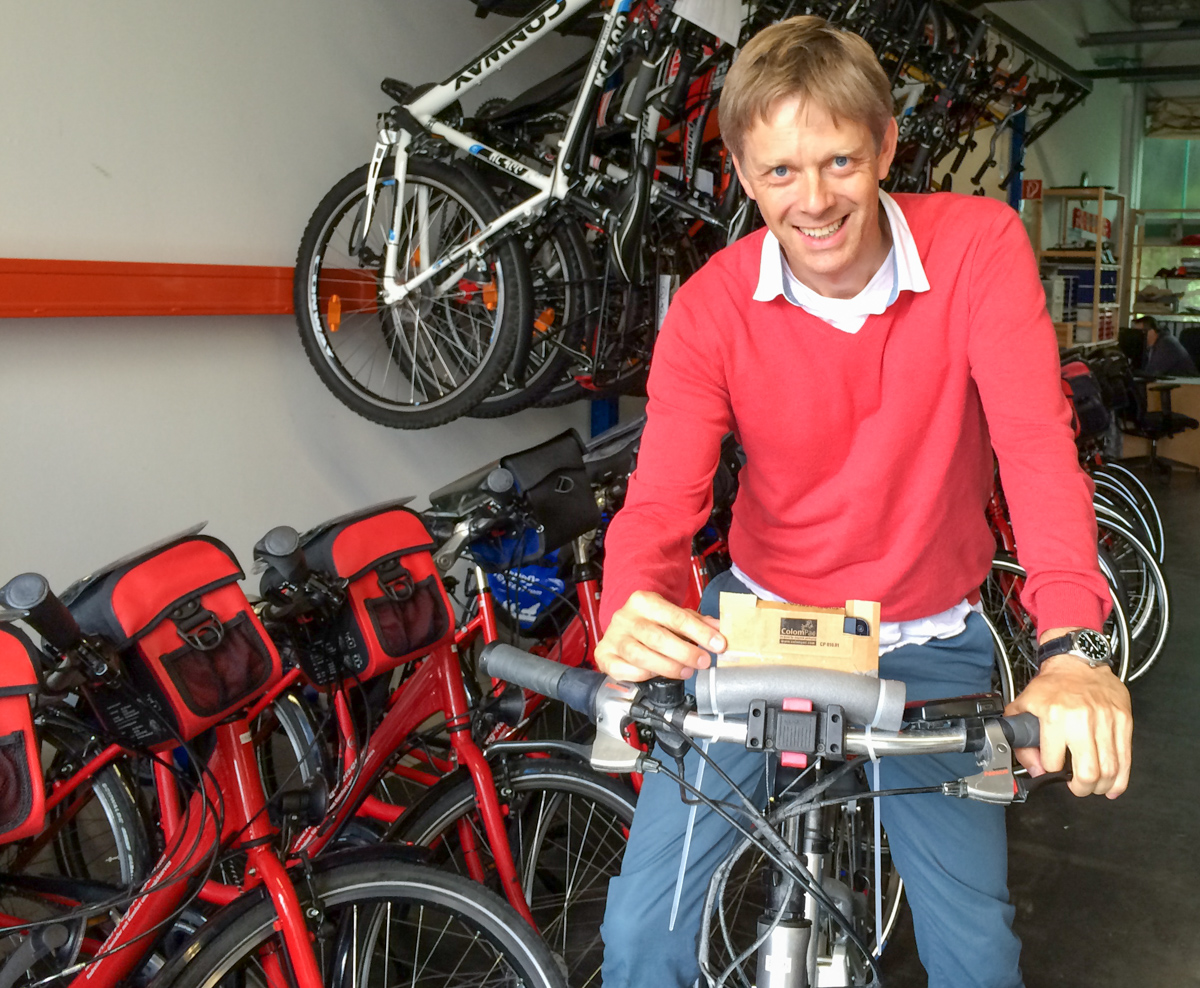
And yesterday I tried (actually: succeeded) to realize street view to a bike path by myself. Since I live in Konstanz, Germany, which is not just also another beautiful European town with nice cafés and many cyclists (actually 19% of all all commutes), but it is especially the starting point of the world’s most popular bike trip, the loop around Lake Constance („Bodensee-Radweg“) with more than 200.000 cyclists per year doing that loop for a holiday. So yesterday I heard the Bodensee-Radweg calling me again.
But in order to take those photos I had to improvise in one thing: there is no mount for an iPhone on a bike (yet). And since my little solution worked very well and was quite cheap (actually less than 3 Euro and less than 30 minutes), I am sharing it with you:
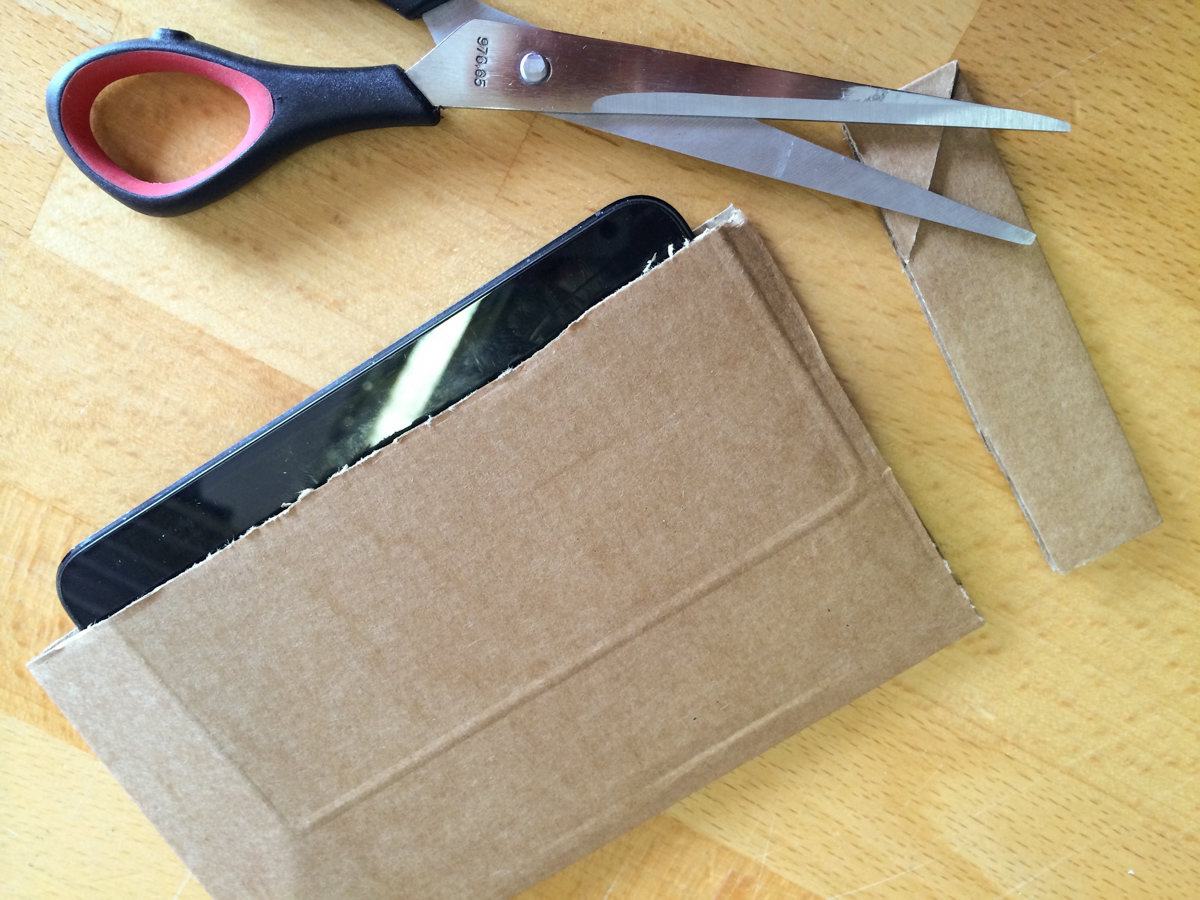
First I took a simple envelope that is made of cardbox.
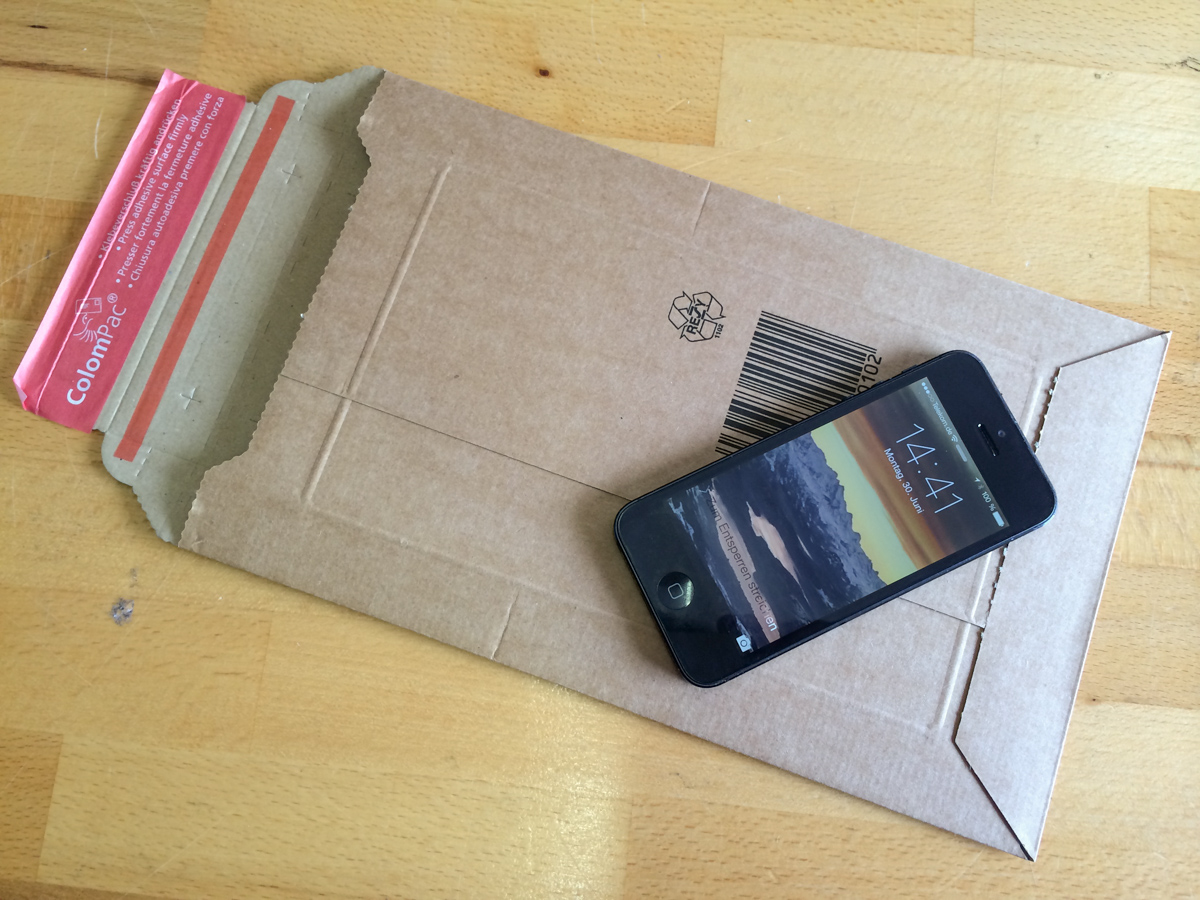
I only used its bottom, so I cut off the rest.
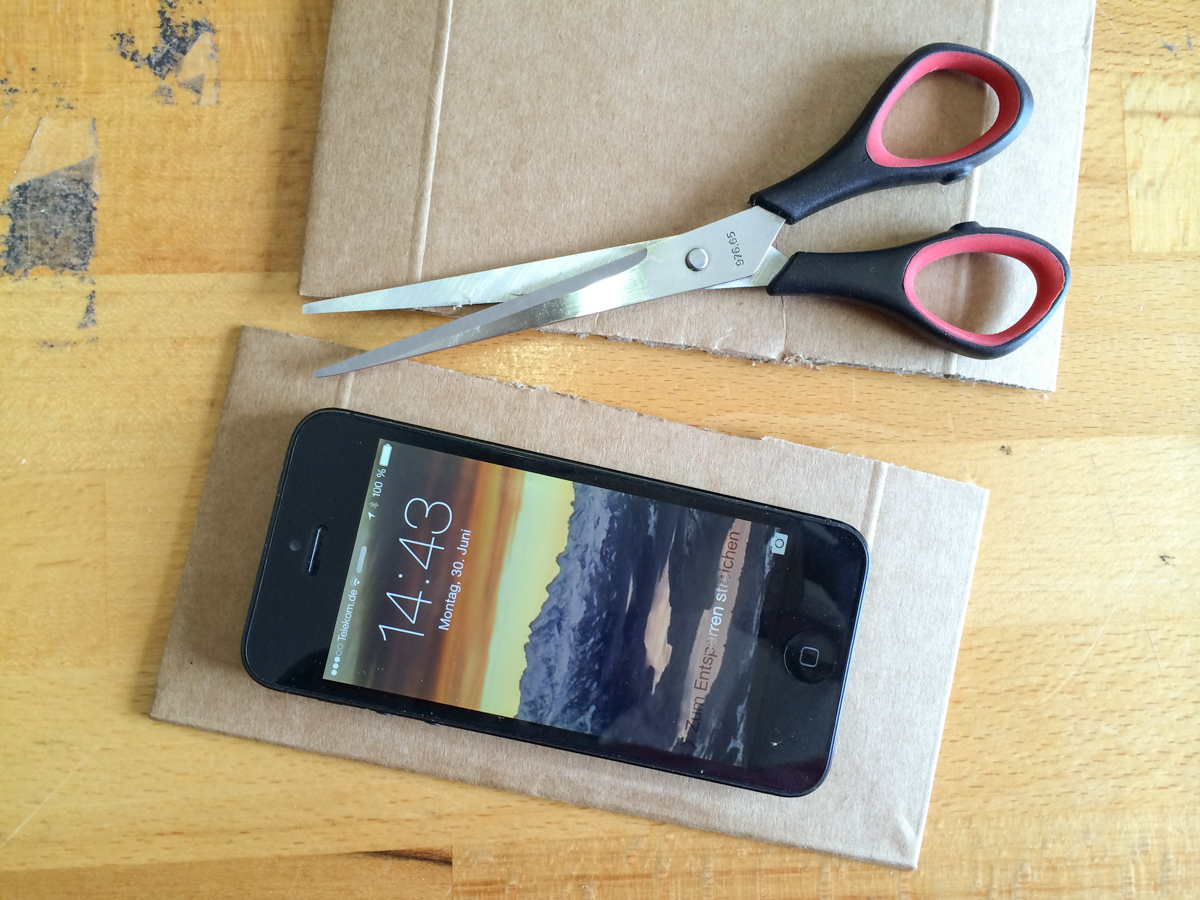
The phone fits nicely in there, but still a bit too loose.
So I had to cut a bit more.
And close the second cut with tape.
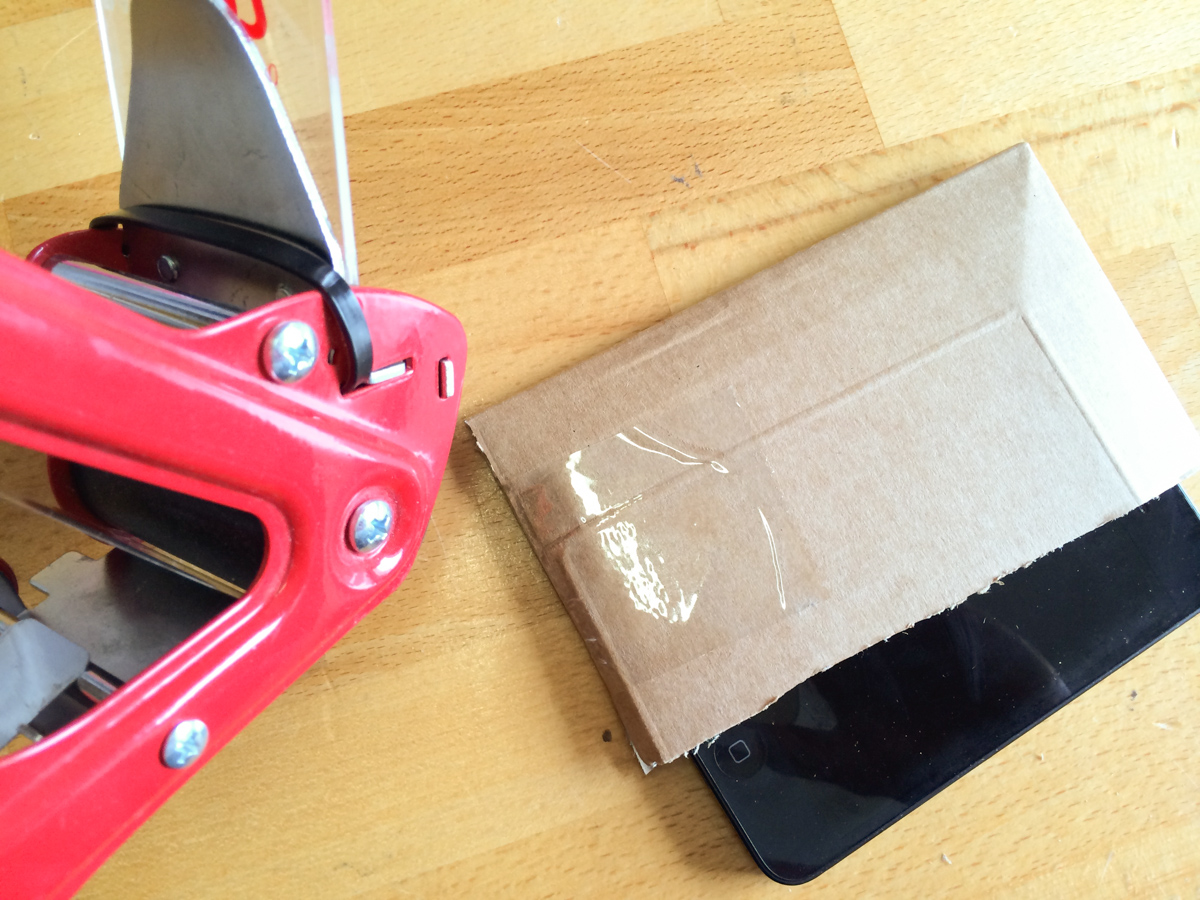
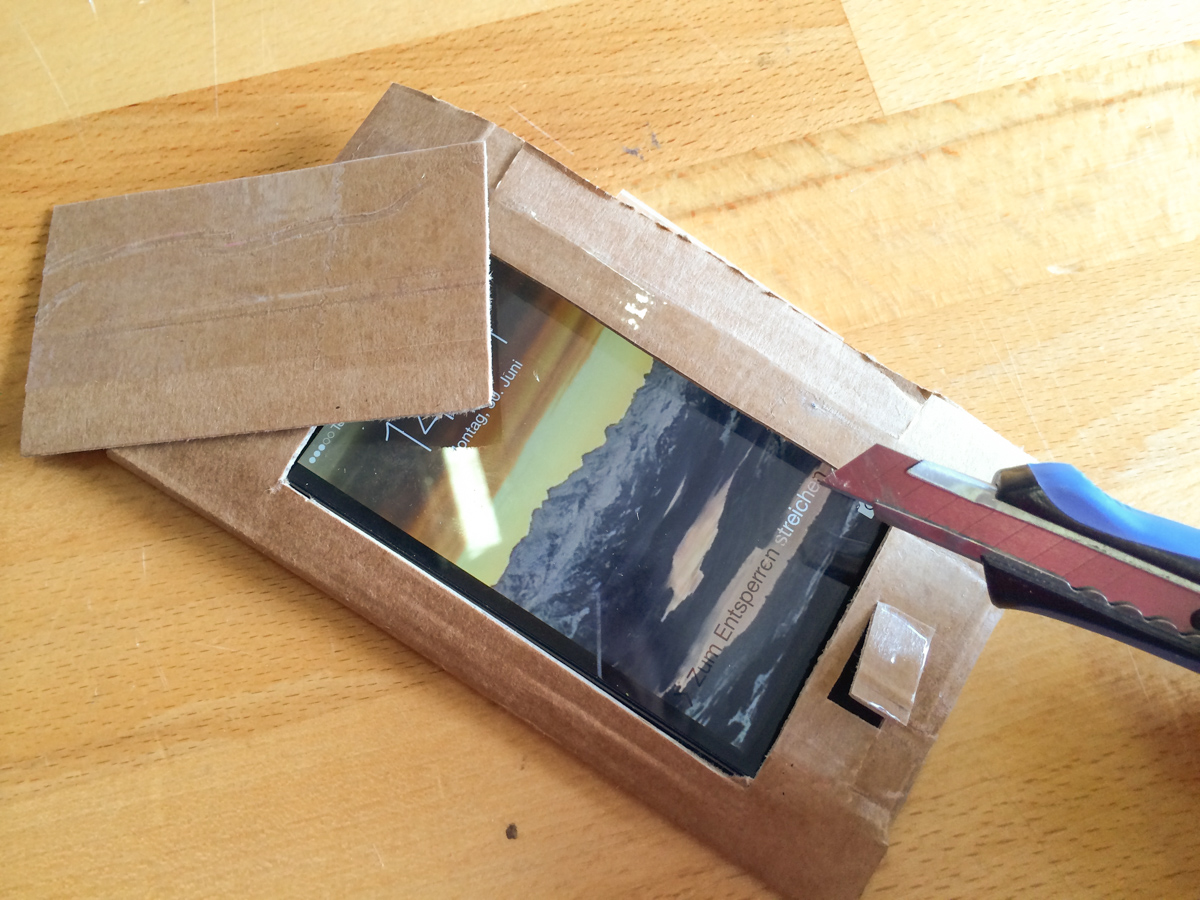
Now I cut a slice for the „eye“, which is the forward camera of the phone.
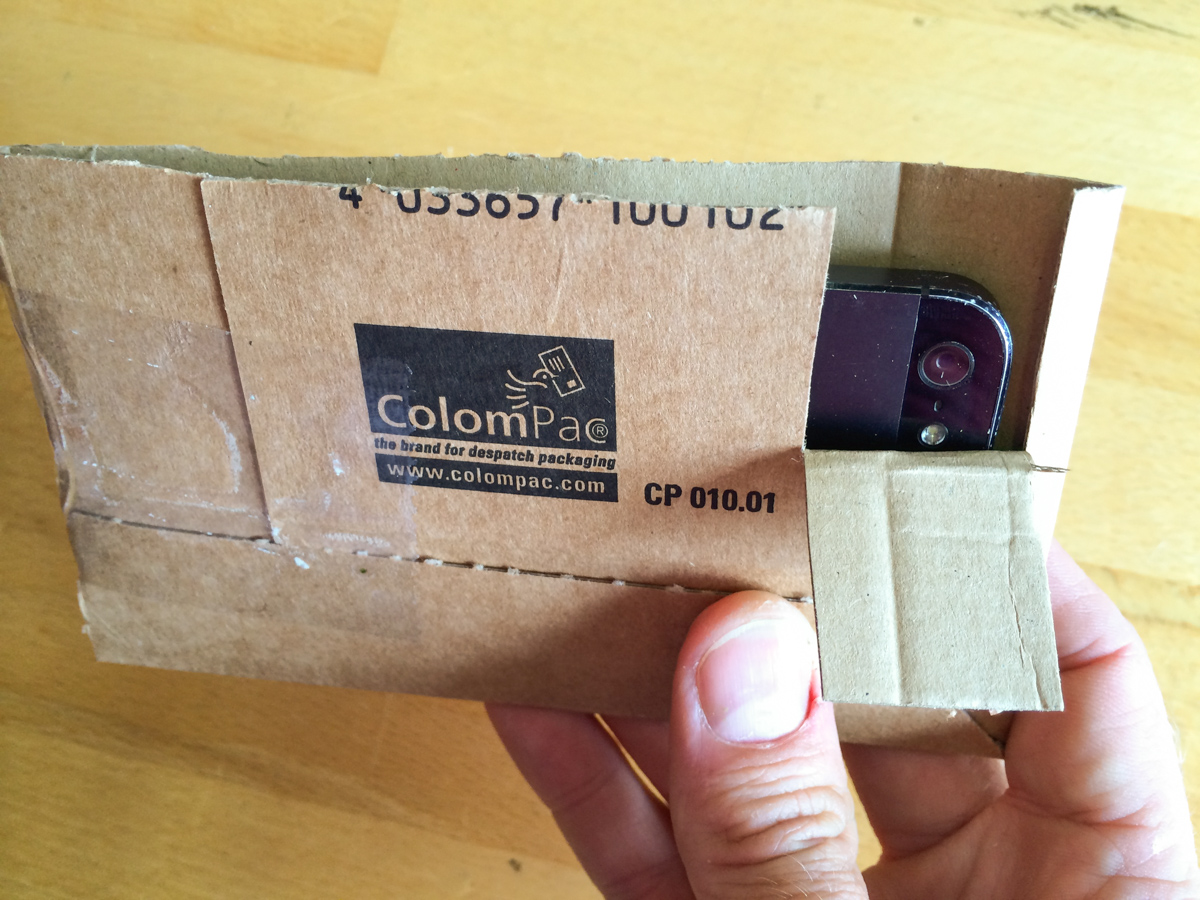
The first cut had also to be closed. But in this case (sic) it had to be a closure that can be re-opened and re-closed many times, since I wanted to use my little device multiple times.
So I first put some tape under the part, where the tape would close the lid (so I can open it again without cardboard sticking to the tape). And then I folded the end of my tape on the lid and stuck it to itself. Kind of a handle that makes re-opening the thing hazzle-free.
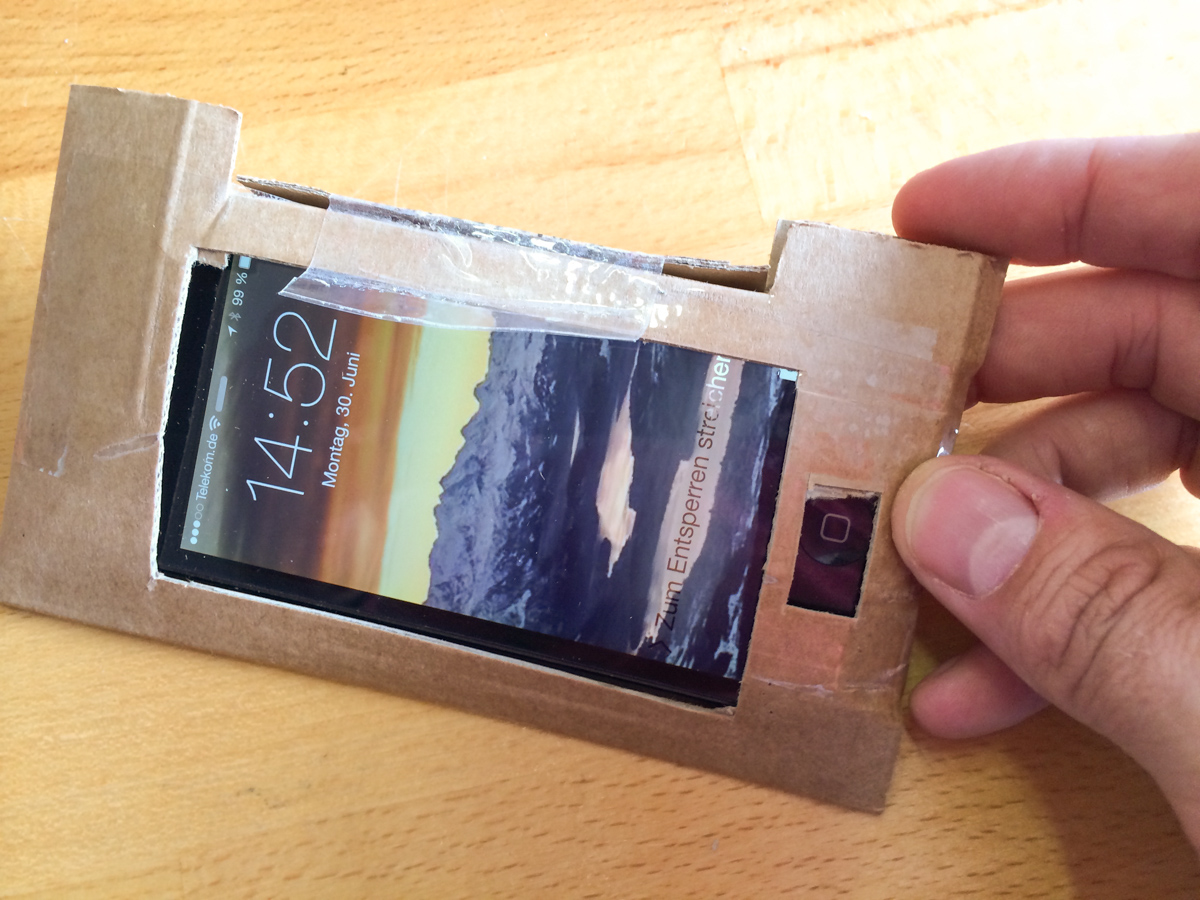
This is how it looks.
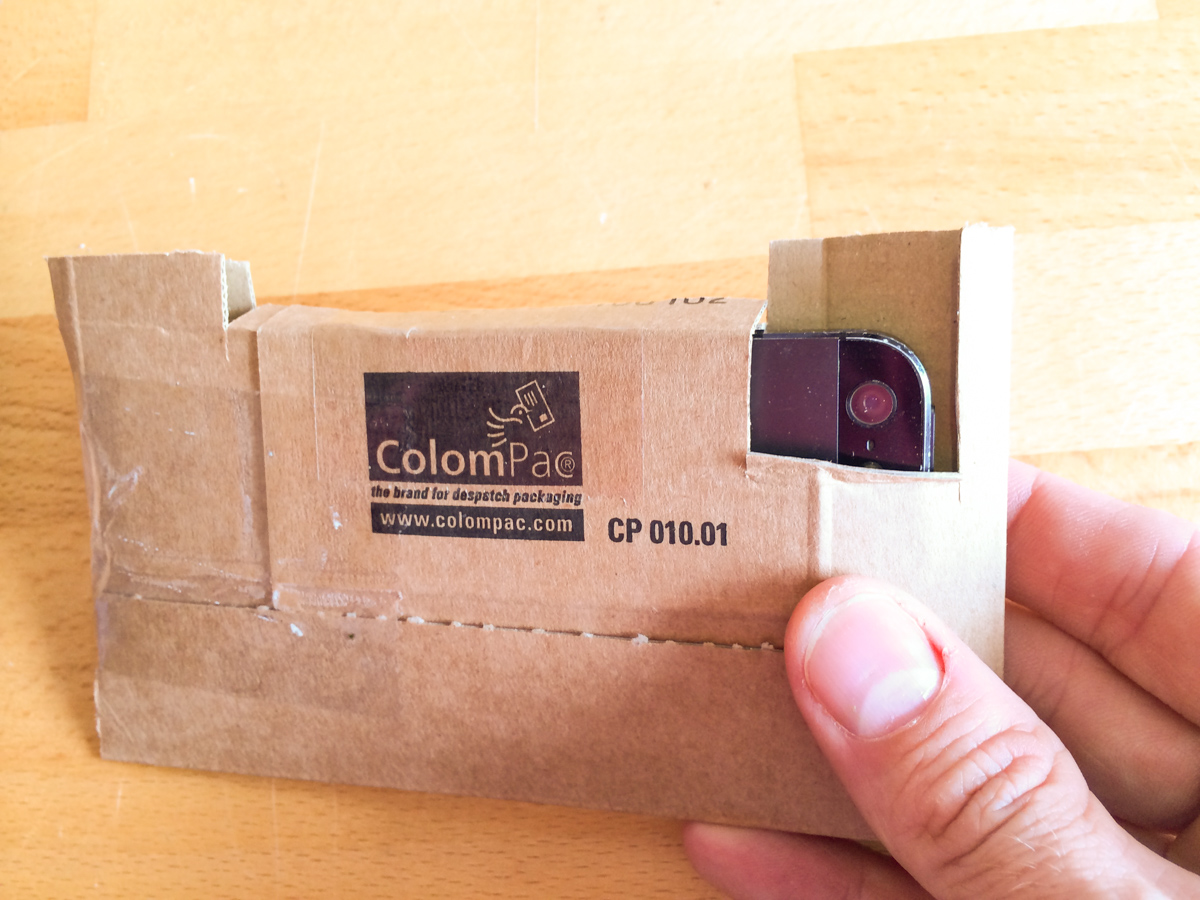
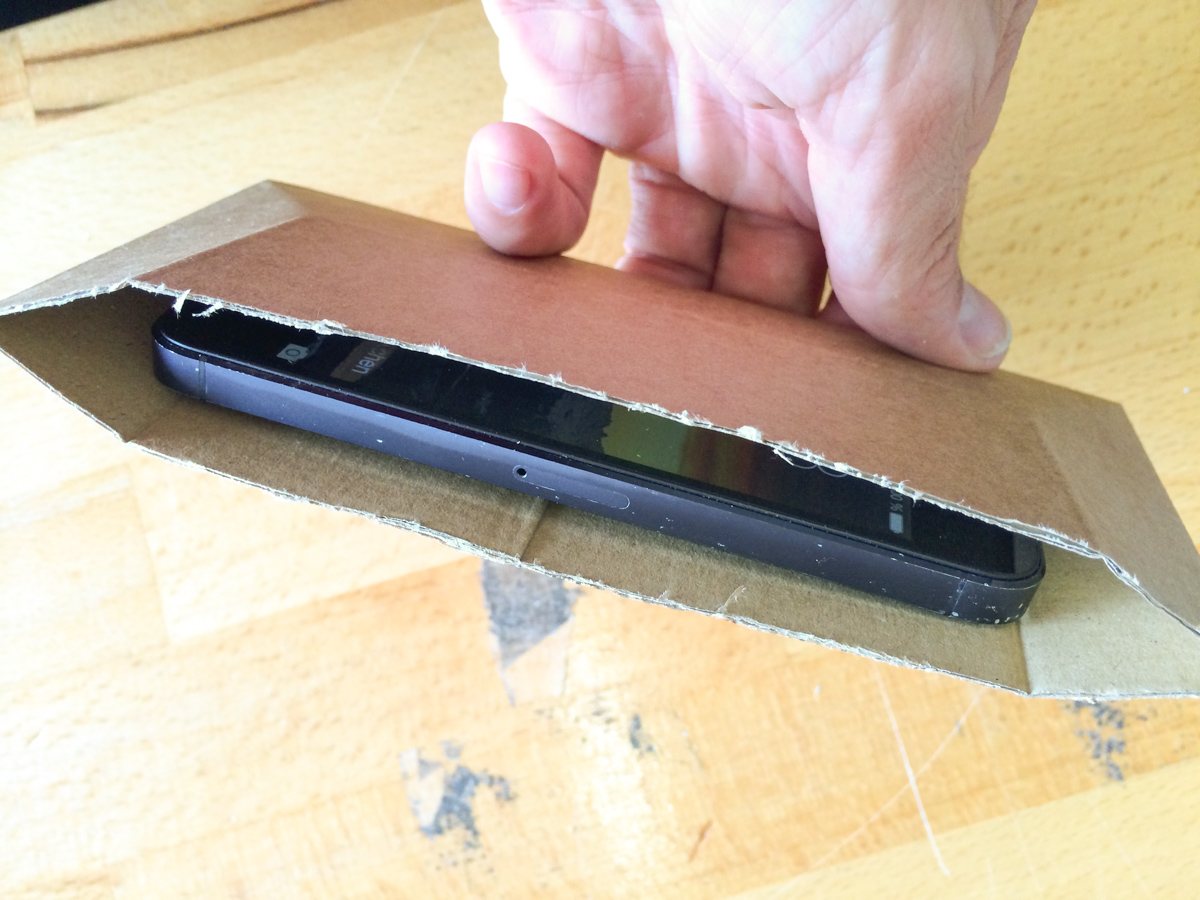
In order to operate the phone (and the app), and to see the photos I am taking, I had to cut the back side open, too.
Of course (!) I didn’t do this while the phone was inside. The photo below is just for illustration.
And you should not do that, either. I started a little smaller, tested, enlarged the hole, and again and again, until the display was quite visible and the phone still well protected against falling out.
Finally, this is my device.
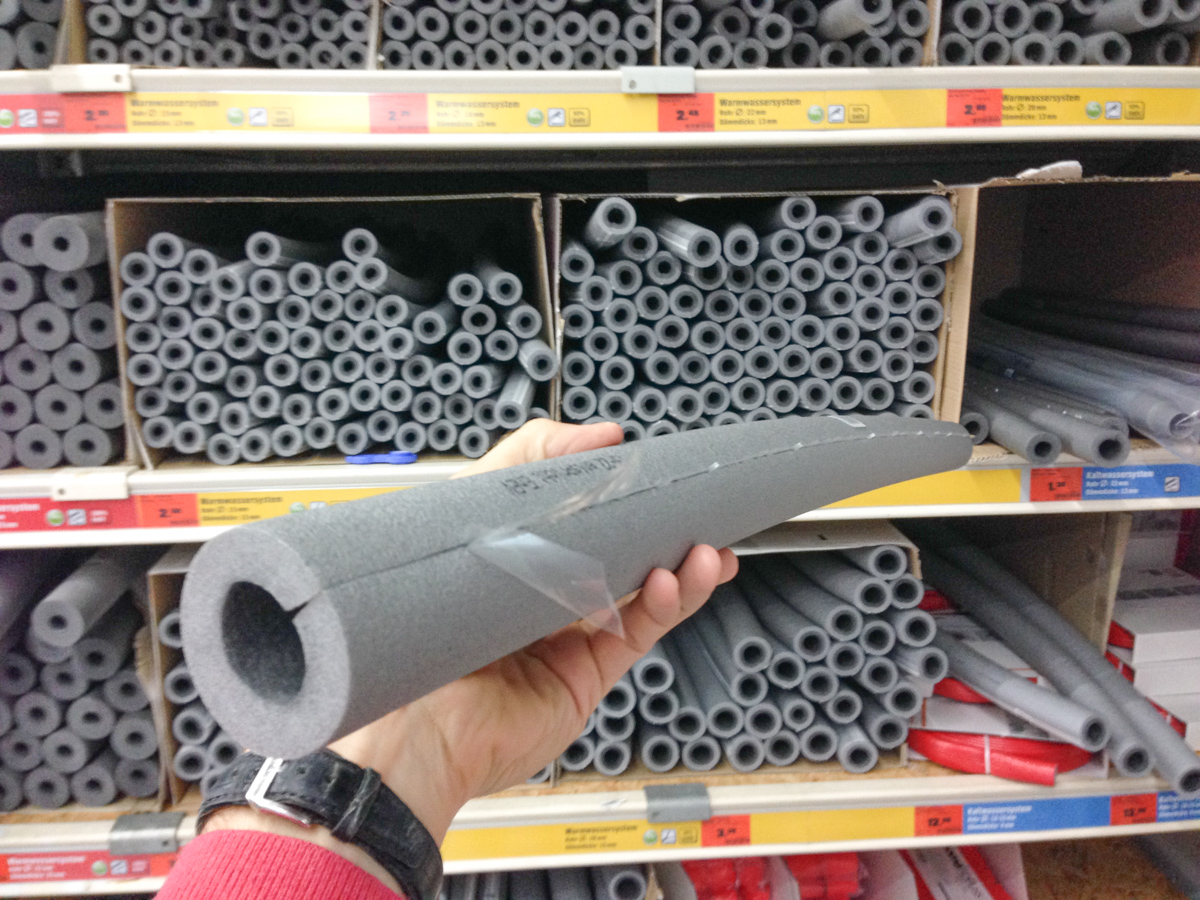
I went to a local handyman market to get some inspiration about how to fix my case to the handle bar.
My best idea was this: I bought a tube of insulation for heating pipes. Cheap stuff, about 2,50 Euro.
Then I measured it up on my bike (in fact it was an e-bike of my former company Radweg-Reisen, thanks for letting me use this speedy thing!).

I cut it down to about 20 cm and put the case in the slot.
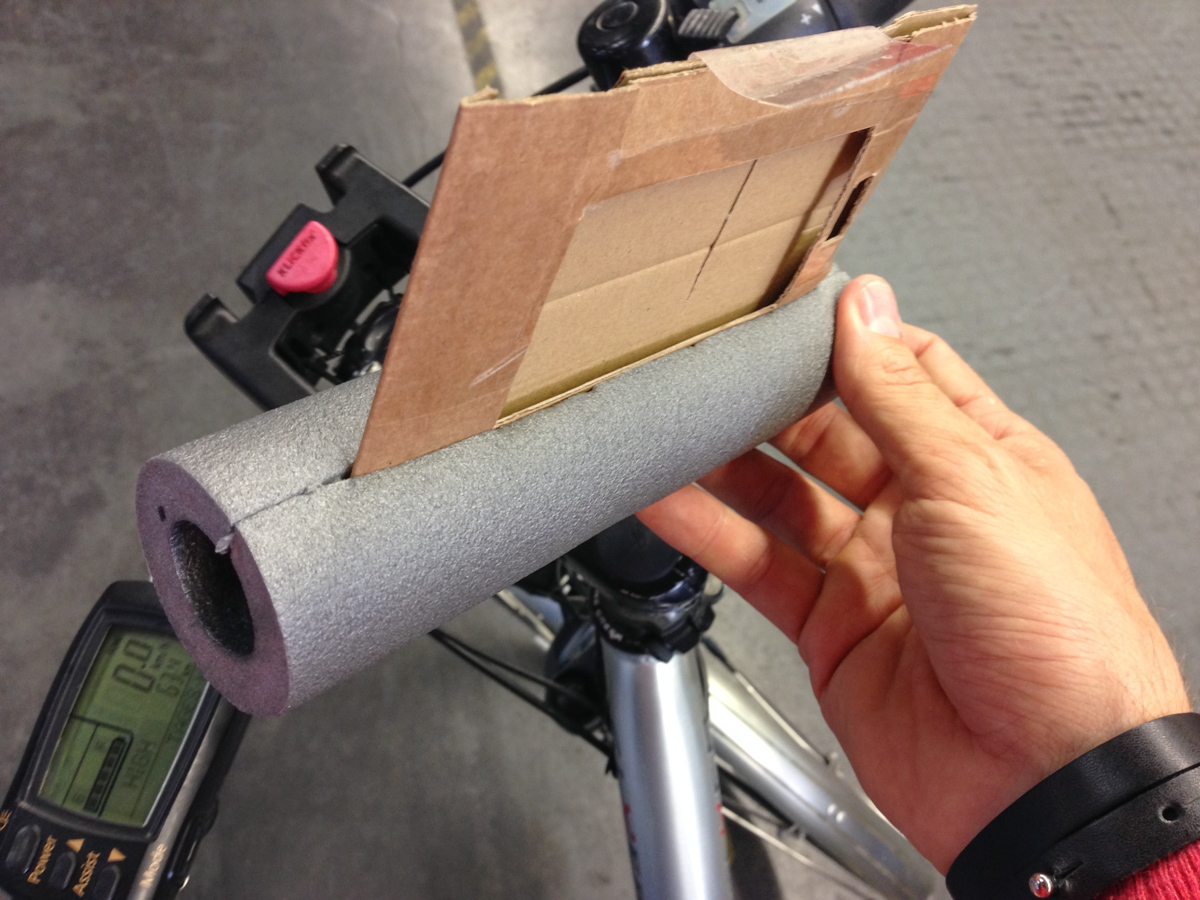
I closed and fixed it with a pair of cable ties.
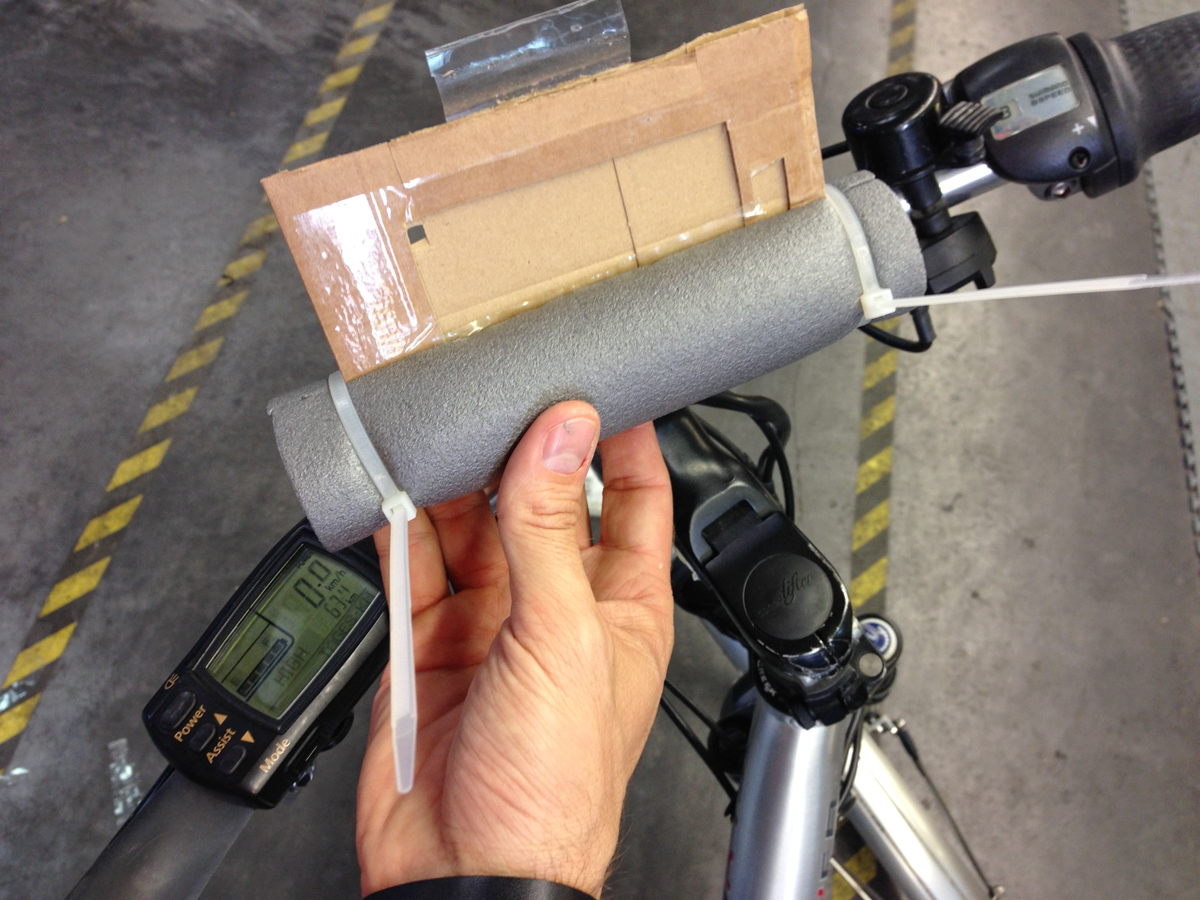
Then I punched two holes in the bottom of the tube diagonally across those cable binder (to make the first pair of binders hold the second ones pair).
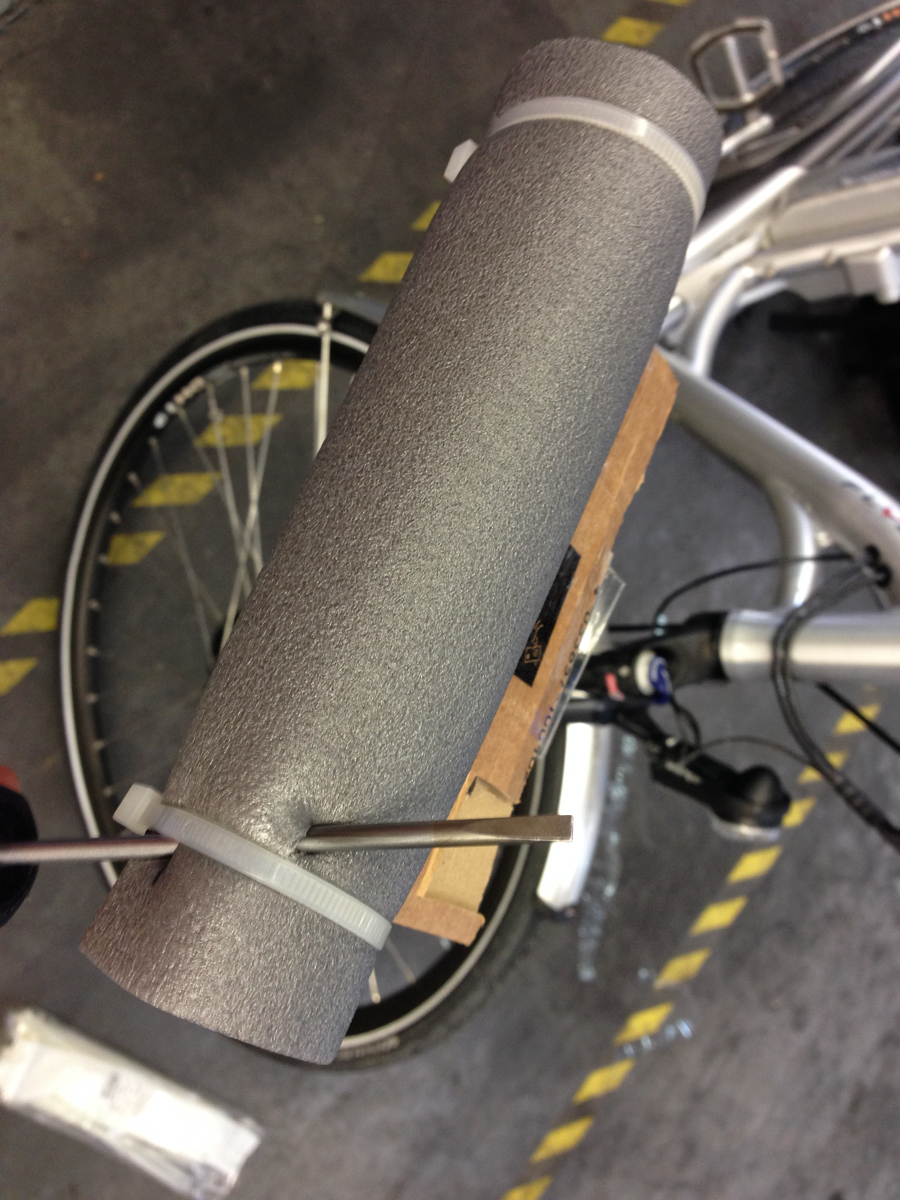
I stuck the second pair of binders through those holes.
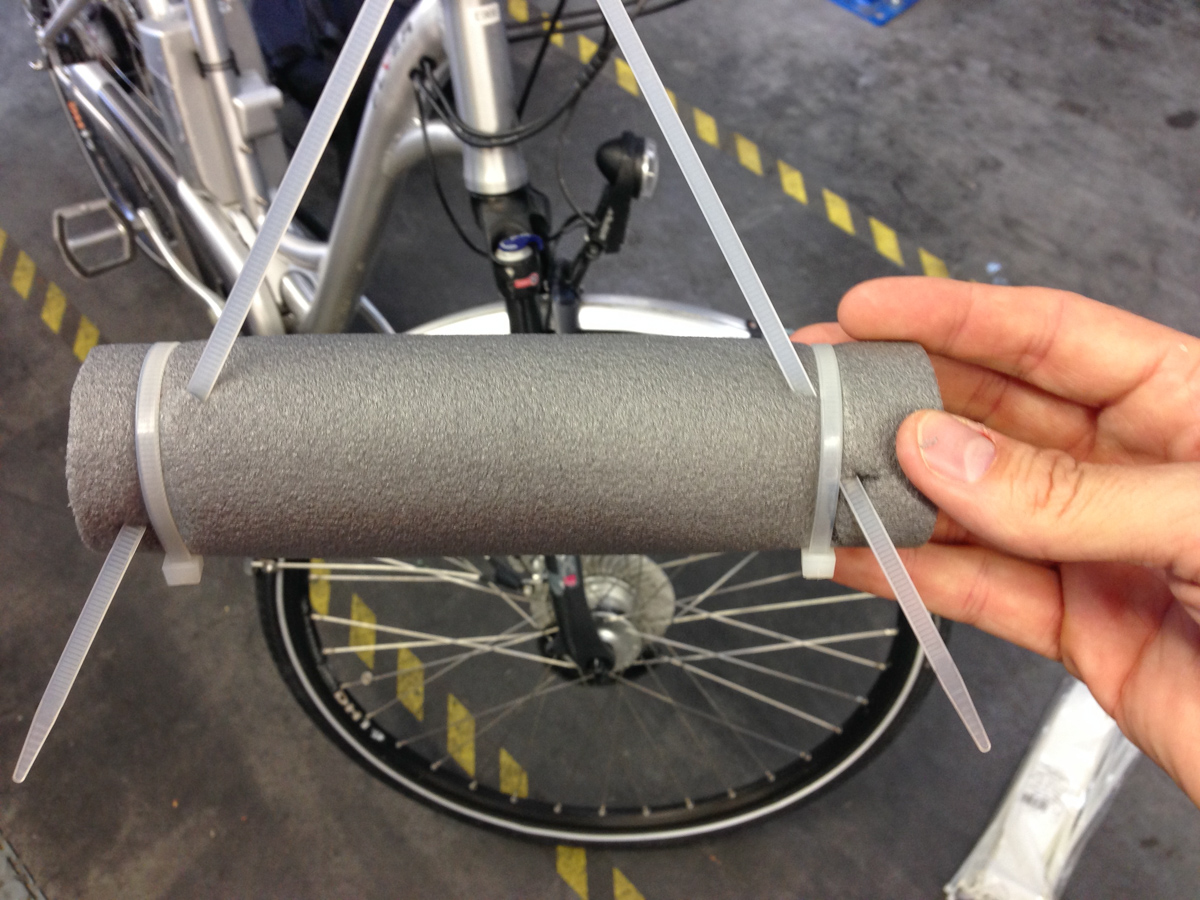
And finally used them to fix the device onto my handle bar.
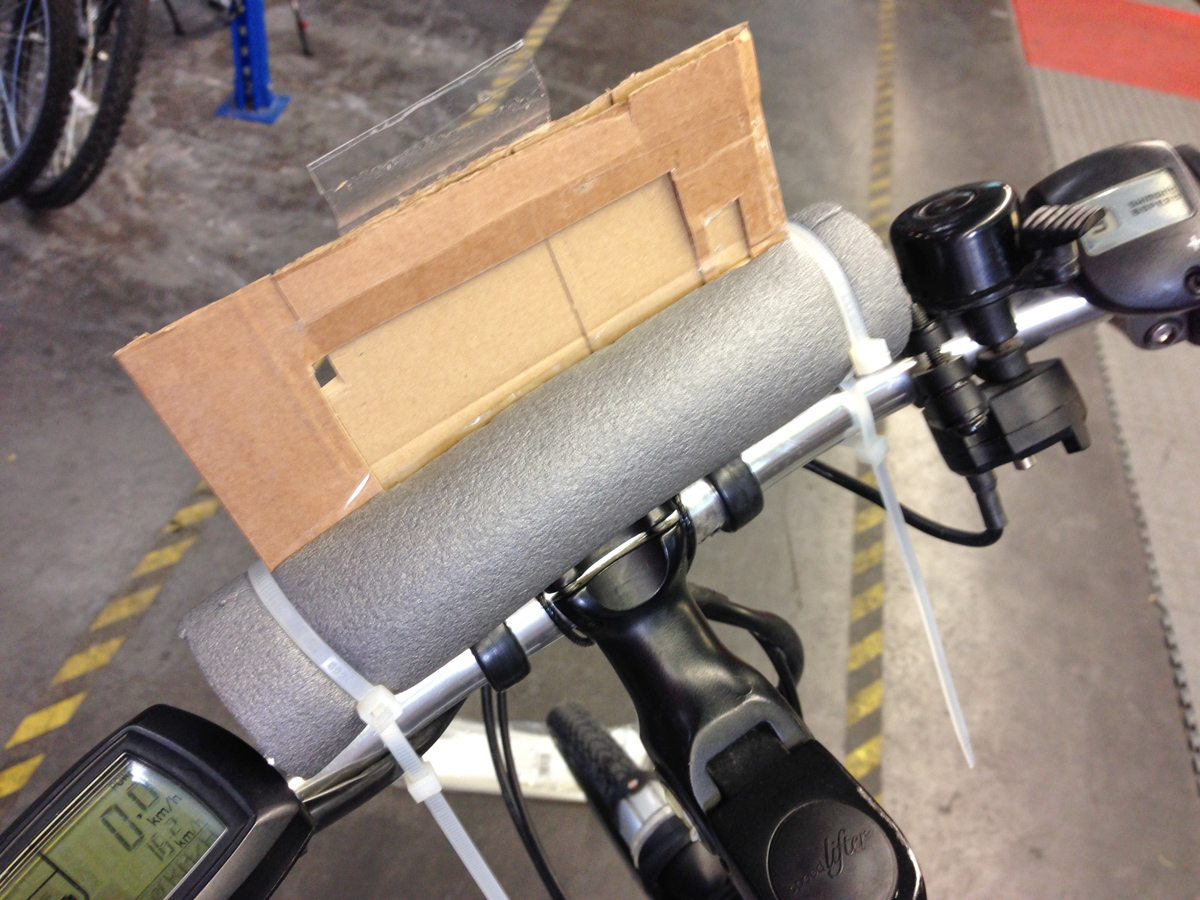
Finished – within less than 30 minutes and for less than 3 Euros.
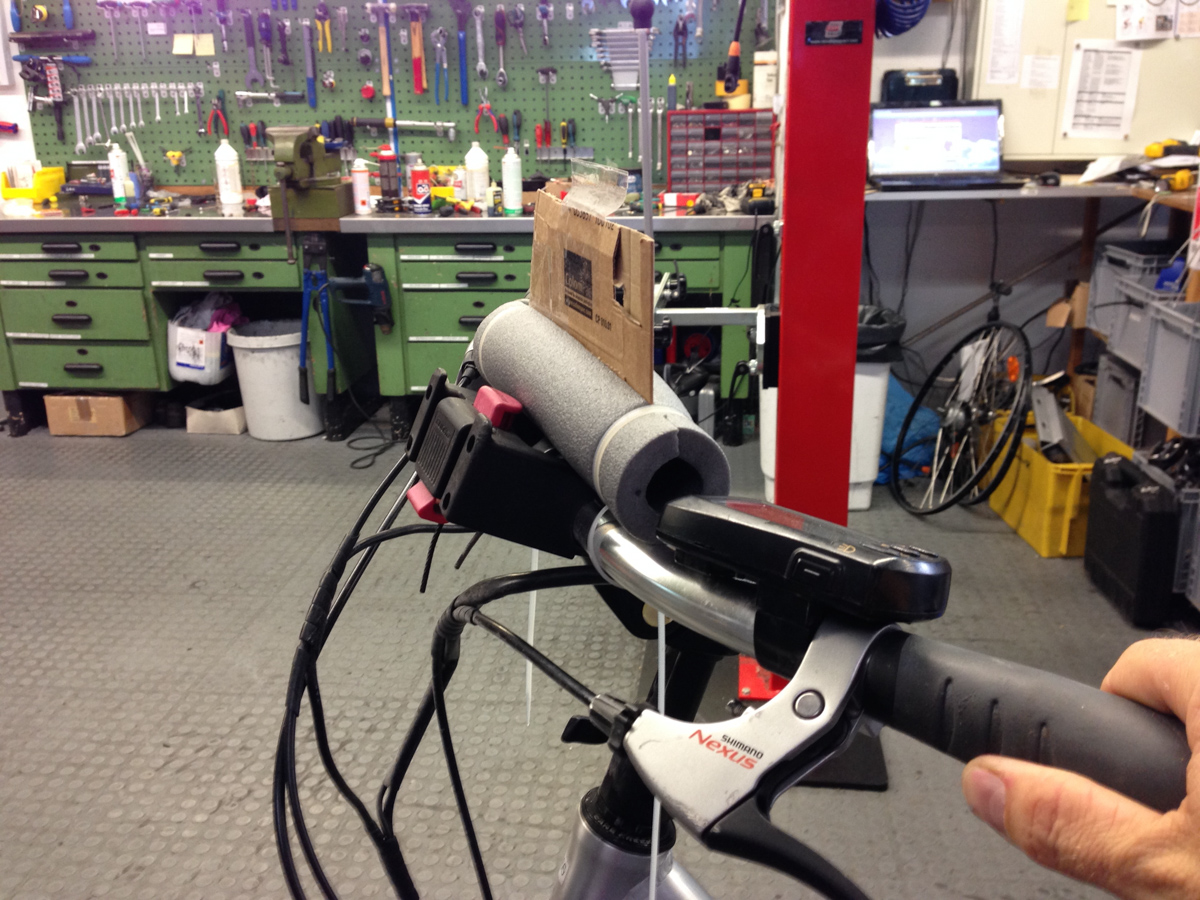
This view from the side shows that I could still influence the degree of how much the camera points upwards by simply rotating the whole device around the handle bars.
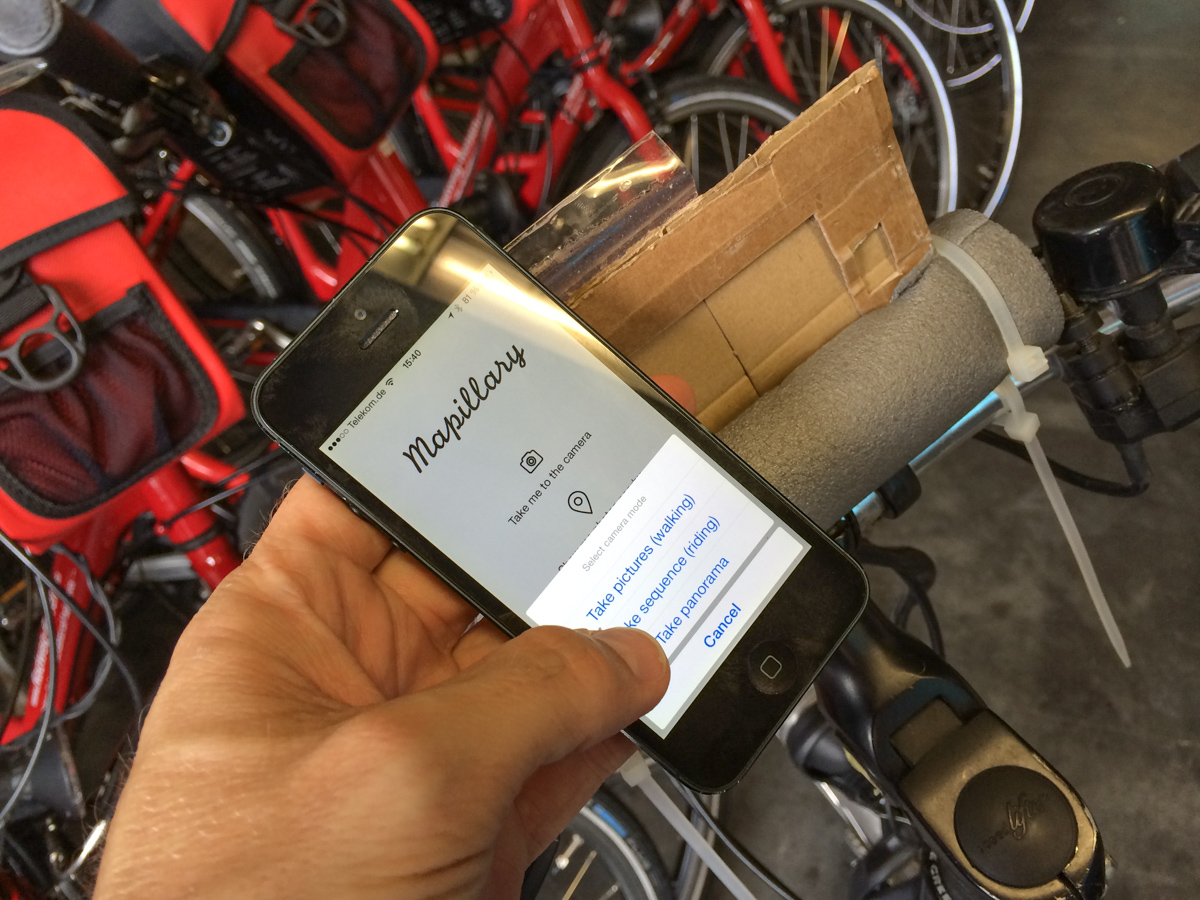
Next step: open the app, activate taking a sequence while riding (doing all the photos every other few meters, triggered by GPS).
Reading the instruction helps. In my case I accidentally actually did the first ride without having pressed the camera symbol ;)

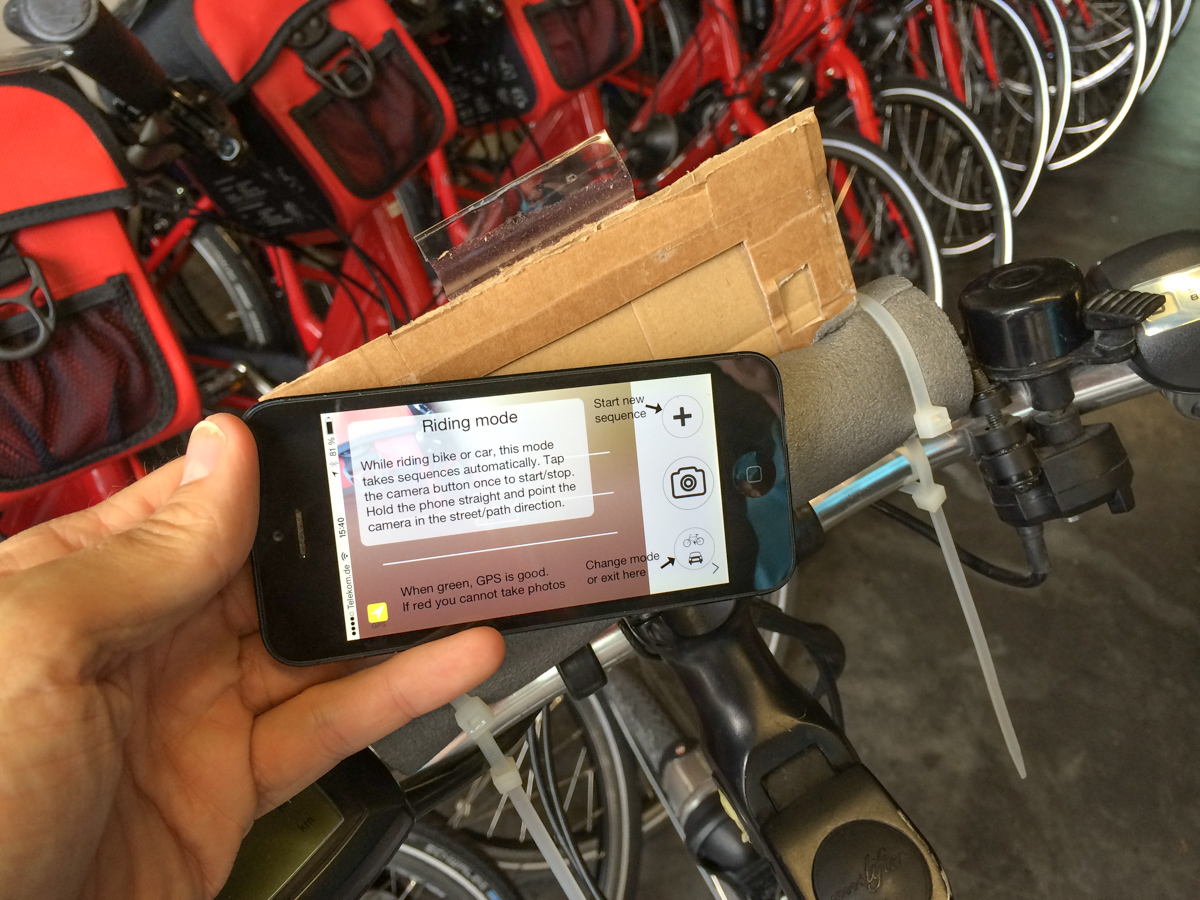
Ready to bike and to shoot. Do not forget to press the camera symbol (until it gets red).
One learning was: the whole device tends to „nod“ a bit, meaning it does lots of tiny rotation movements around the axis of the handle bar. I simply stopped that by grapping the foamy tubes instead of the handle bar grips while riding.
Second learning: deflate your tires as much as possible. That helps smoothening the ride very much.
Third learning: start with your battery fully loaded (or have some extra battery or some loading transformator for your dynamo on board), since – as you can see – by battery ran down to 1%.
Fourth learning: have (or make) a few (at least 4) GB of memory free on your phone. All photos will be deleted automatically after uploading them to Mapillary. But until then you need to store them.

Uploading > 1.000 photos can take a few hours.
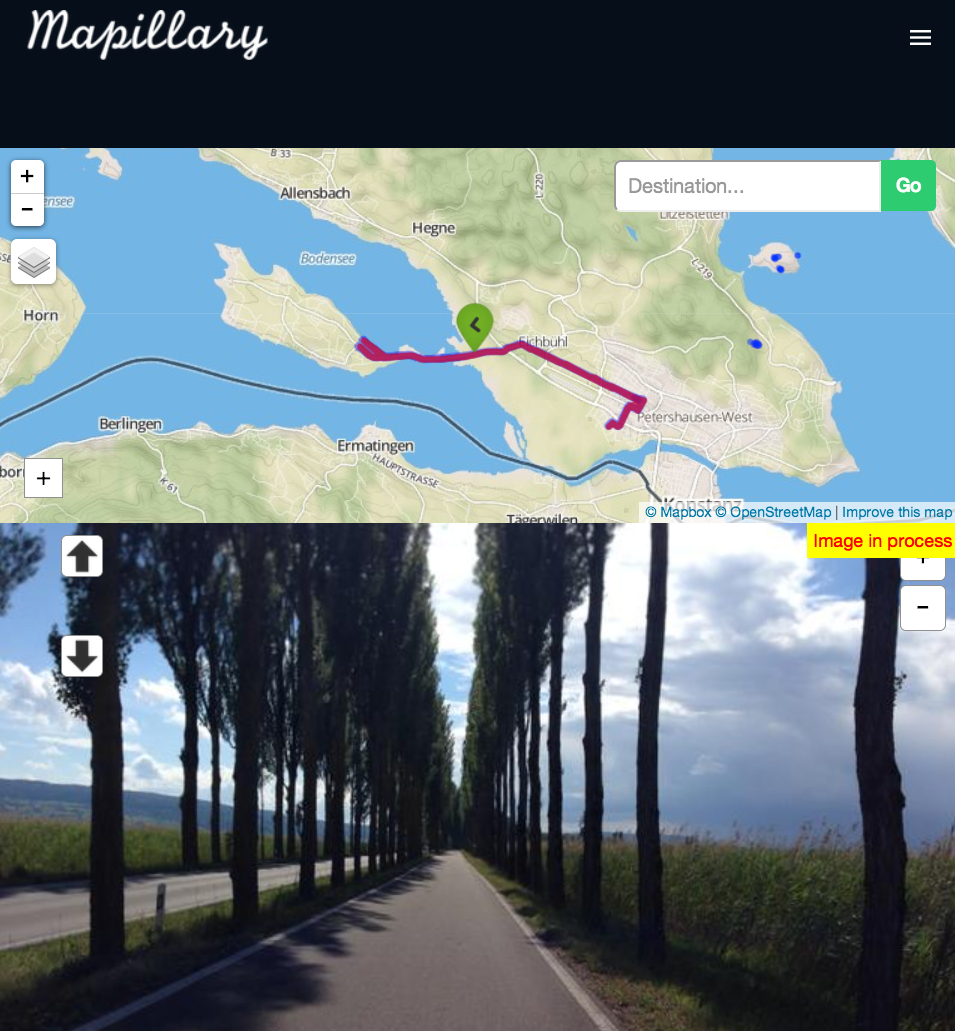
But right after that is finished, your bike path will appear on Mapillary within seconds. That feels great.
Here is my result of yesterday’s ride:
Now what happens with those photos?
First they are available for free on Mapillary. I do still own my photos, but I granted Mapillary the non-exclusive right to display and modify them (necessary since they blur license plates etc.).
Non personal and commercial users might not get free access to data on Mapillary. Meaning that any service using their API to display street view of bike paths etc. on their own websites might have to pay Mapillary for their service. That’s kind of fair.
Are those photos now under a CC license, as the whole Openstreetmap project is? Well, actually I do not know. Mapillary does not write anything about this question, but since CC licenses are „inherited“ I guess the result of their work should (in theory) still be CC.
Maybe you know more about the license question? I’d be glad to hear your thoughts.
And now: happy street viewing!